Quite a lot of developers are having troubles deploying Laravel applications onto a cPanel shared hosting server.
In this article, I’ll be showing you how to deploy your Laravel apps on a shared hosting server via cPanel .

Quickly deploy Laravel 8 Apps on shared hosting via cPanel
1. Compress your Laravel 8 App
I’m assuming you have built your app and it runs without errors on your local server (XAMPP, WAMP, LAMP or Laragon). The first step in this tutorial is to archive your app (preferably in zip format) and get set to upload to your cPanel account. Feel free to check out the official Laravel docs for how to create a Laravel project if you don’t already know how to.
2. Upload your Laravel App onto cPanel
The next step is to export your zipped project to the root directory of your cPanel account. This can be achieved either by uploading via an FTP client of your choice (such as FileZilla or Core FTP) or directly on the cPanel file upload page.
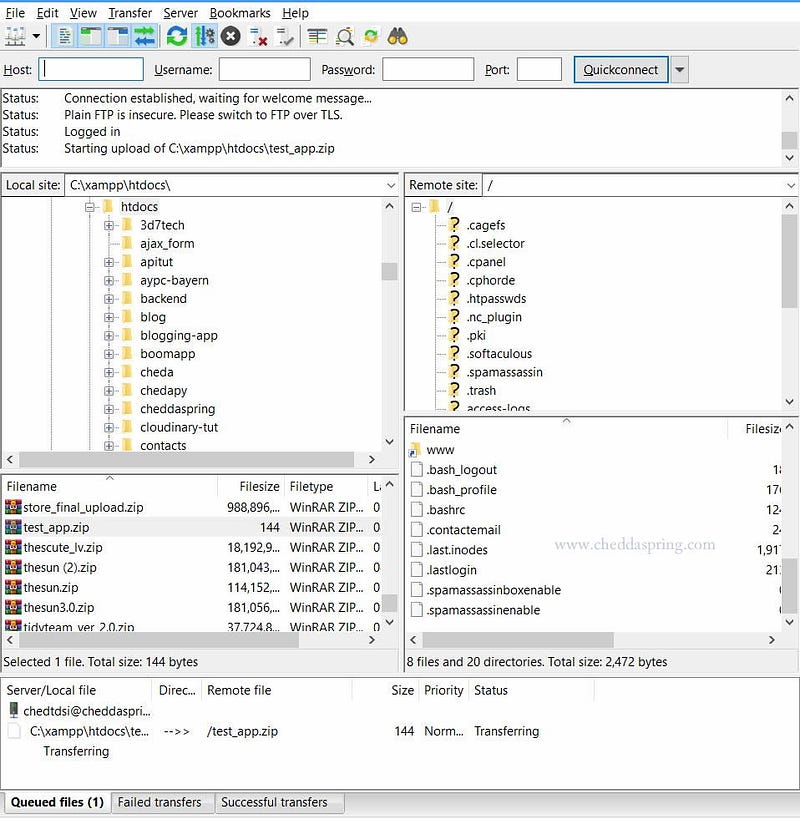
Uploading zipped files to cPanel via FileZilla FTP Client
3. Extract your Laravel App in cPanel
Having successfully uploaded your app to your cPanel account, The next step is to extract your zipped app to your preferred directory. Again, feel free to check out the tutorial below if you don’t already know how to go about this.
4. Export your Database from your Local server
This step is pretty straight forward. Here, you need to export the Database for your app from your local server (localhost/phpmyadmin)in any format of your choice, preferably SQL.
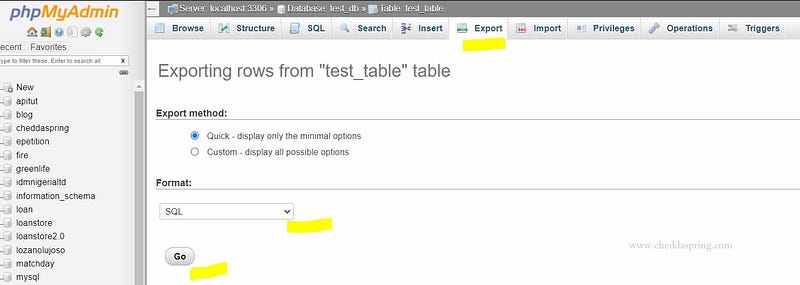
Exporting Database from your Local server
4. Import your Database to cPanel
Again, this step is pretty straight forward. Here, you need to create a MySQL database and user in your cPanel with all privileges granted. Once this is setup, you may proceed to phpmyadmin to import you app’s database. Remember to update your .env file with new database credentials. Feel free to checkout the tutorial below on importing database to cPanel.
5. Setup an .htaccess file for redirecting to Laravel’s public folder
This is where all the magic happens. Haven successfully uploaded your app files and database, we need to tell the server where we’ll be serving our public files from. In Laravel the path for serving your web page is in the /public folder. By default after installing Laravel and navigating in a browser to the URL you will see a directory listing of all the Laravel files. Here’s an easy way using an .htaccess file to redirect requests of user to the Laravel /public folder mod_rewrite.
Create a .htaccess file in your root directory and add the following code.
RewriteEngine On
RewriteRule ^(.*)$ public/$1 [L]
You may experience an issue locating the .htaccess and .env files in the file manager. Here’s a simple tutorial on how to show hidden files in cPanel.
In Conclusion
If you’d rather not use a private hosting for your Laravel App, It’s also okay to have your Laravel app hosted on a shared hosting server via cPanel as it saves you more cost. Feel free to leave any comments on this if you liked it or have any questions or ran into hiccups along the way and I’ll gladly respond.
I hope it’s helpful for you
Cheers!